
TL;DR:
- Most adults seeking injectables aim for a natural, rested appearance achieved through careful, medically guided techniques. Proper preparation, understanding each procedural stage, and vigilant aftercare minimize risks and enhance long-term results. Subtle enhancements, grounded in anatomy knowledge and restraint, prioritize safety and authenticity over dramatic change.
You want to look like yourself, only more rested. Not frozen. Not overdone. Just quietly supported. That’s the goal most adults bring into an injectable consultation, and it’s a reasonable, attainable one when the process is guided by trained clinicians who understand both anatomy and restraint. The challenge is that without a clear roadmap, injectables can feel intimidating or, worse, unpredictable. This guide walks you through every stage of the process, from choosing the right provider and preparing your skin, to understanding aftercare and recognizing when something needs attention.
Table of Contents
- Preparing for your injectable treatment
- Step-by-step: The injectable procedure
- Aftercare and recovery: What to expect
- Risks, warning signs, and knowing when to seek help
- Making your results last: Expert strategies for natural enhancement
- Why subtle, medically guided injectables make all the difference
- Ready for natural enhancement? Explore your options in Raleigh
- Frequently asked questions
Key Takeaways
| Point | Details |
|---|---|
| Choose a credentialed provider | Safety and natural results start with a medically qualified injector and in-person exam. |
| Follow preparation guidelines | Avoid certain medications, alcohol, and strenuous activities before and after your appointment. |
| Monitor your recovery | Swelling and bruising are temporary; know the warning signs of uncommon complications. |
| Plan touch-ups wisely | Maintenance and subtle enhancements ensure you look natural and feel confident long-term. |
| Trust subtle, medically led methods | Expert technique and anatomy knowledge deliver safer, more satisfying enhancements. |
Preparing for your injectable treatment
With anxiety about risks and outcomes addressed, let’s start by detailing how you should prepare for your injectable appointment. Preparation isn’t a formality. It’s the foundation of a clean, comfortable procedure and a result that looks natural from day one.
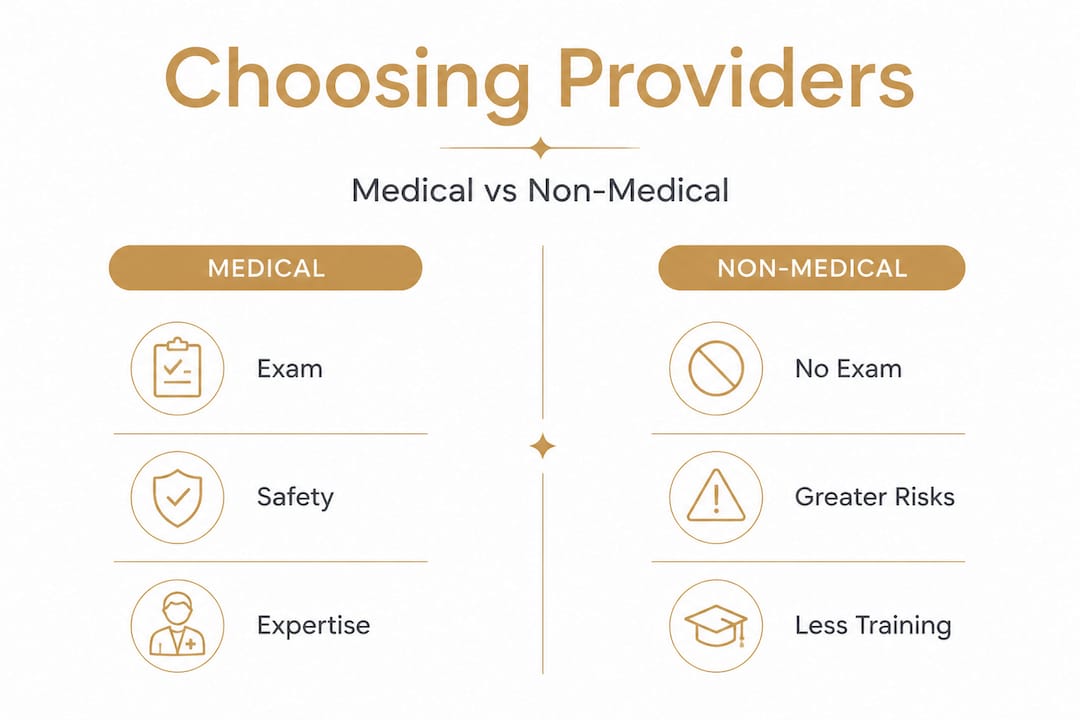
Choosing a credentialed provider
The single most important decision you make happens before any needle is uncapped. Fillers are medical treatments, and as the American Med Spa Association emphasizes, they should be administered only after an in-person exam by an appropriately licensed clinician. Working with a medically trained provider means your facial anatomy is evaluated, your health history is reviewed, and your goals are matched to the right product and placement strategy.
Explore Raleigh injectables overview to understand what a medically led approach looks like in practice before you book.
| Standard | Medical provider | Non-medical provider |
|---|---|---|
| In-person exam required | Yes | Not always |
| Licensed clinician on site | Yes | Varies |
| Emergency protocol available | Yes | Rarely |
| Anatomy-specific technique | Yes | Inconsistent |
| Product sourcing transparency | Yes | Often unclear |
Pre-treatment instructions to follow
Following your provider’s pre-treatment guidelines reduces bruising, swelling, and interference with your results. Based on ASPS guidance, here’s what to avoid before your appointment:
- Aspirin and NSAIDs (ibuprofen, naproxen) for 5 to 7 days before treatment, as they thin the blood and increase bruising risk
- Alcohol for at least 24 to 48 hours before your appointment
- Strenuous exercise for 24 hours prior
- Excessive heat, including saunas and hot tubs, for 24 to 48 hours
- Massage or aggressive facial manipulation in the treatment area
These restrictions are not arbitrary. Blood thinners and alcohol both increase capillary fragility, which means even a precise injection can produce more visible bruising when these substances are in your system.
Pro Tip: Schedule your appointment at least two weeks before any major social event. Even when everything goes perfectly, early swelling can affect how you feel about your results in the first few days. Give yourself time to settle before a wedding, reunion, or work event.
For a broader look at how preparation connects to your overall outcome, review these injectables best practices from a clinical perspective.
Step-by-step: The injectable procedure
After preparing thoroughly, here’s what you can expect during your injectable visit, from clinical exam to final touch. Understanding each step makes the experience feel measured and calm, not clinical and rushed.
The procedural stages, explained
- Consultation and clinical exam. Your provider reviews your goals, assesses your facial anatomy, and identifies any contraindications. This is where treatment is planned, not just confirmed.
- Photography. Before photos document your baseline and serve as a reference throughout treatment and follow-up.
- Marking and mapping. Injection points are marked based on anatomy, not templates. Each face has unique muscle structure and vascular geography.
- Cleansing and preparation. The treatment area is cleaned with an antiseptic solution to minimize infection risk.
- Topical numbing (if applicable). A topical anesthetic may be applied and allowed to take effect for 10 to 20 minutes, depending on the area being treated.
- Injection. Product is placed using careful, anatomy-aware technique. Layering, depth, and volume are adjusted in real time based on how your tissue responds.
- Gentle molding. The provider may lightly smooth the treated area to distribute product evenly and check symmetry.
- Assessment and review. Results are evaluated while you’re still in the chair. Minor adjustments may be made. Your provider discusses what to expect over the next several days.
| Stage | Approximate time |
|---|---|
| Consultation and exam | 15 to 30 minutes |
| Photography and marking | 5 to 10 minutes |
| Cleansing and numbing | 10 to 20 minutes |
| Injection and molding | 10 to 30 minutes |
| Assessment and review | 5 to 10 minutes |
| Total visit time | 45 to 90 minutes |
As the American Med Spa Association notes, fillers are medical treatments that should be administered after an in-person exam by a licensed clinician. Skipping that exam step to save time is one of the most common ways patients end up with outcomes they didn’t want.
Natural facial enhancement is not about adding volume indiscriminately. It’s about restoring proportion and softness in places where age or stress has quietly diminished it. And injectables in aesthetics have matured considerably, with modern techniques prioritizing movement and believability over correction for its own sake. You can also explore specific Raleigh dermal fillers to understand which product categories are used for different concerns.
Safety note: Know the warning signs of vascular occlusion (a blockage of a blood vessel) before you leave your appointment. These include sudden, severe pain at the injection site, white or mottled skin discoloration, and increasing pressure or blanching. If any of these occur, contact your provider immediately or seek emergency care. Understanding risks of fillers is part of being a well-prepared patient.
Pro Tip: Before your procedure begins, ask your provider which filler product is being used, where it will be placed, and why. A confident, medically trained clinician welcomes this conversation. Transparency is a signal of quality care.
Aftercare and recovery: What to expect
Once the procedure is finished, proper aftercare is key to both your comfort and achieving ideal, natural-looking results. The first 48 hours matter most, but the full settling process takes longer than most people expect.

Immediate aftercare: What to avoid
According to ASPS filler aftercare guidance, the following activities and substances increase bruising, swelling, or the risk of product migration:
- NSAIDs and aspirin for 24 to 48 hours post-treatment
- Alcohol for at least 24 hours
- Strenuous exercise for 24 hours (raises blood pressure and can worsen bruising)
- Excessive heat, including hot showers, saunas, and heated yoga, for 24 to 48 hours
- Massaging or pressing on the treated area, which can displace filler before it has fully integrated
- Lying face-down or sleeping on the treated area in the first night or two
Sleep position matters more than most people realize. Pressure on freshly injected tissue while you’re horizontal can subtly shift product placement. Sleeping on your back, or at least avoiding direct face pressure, is a small habit that protects your result.
What the healing timeline actually looks like
Most filler aftercare tips focus on the first few days, but a realistic timeline helps you feel grounded:
- Days 1 to 3: Swelling and possible bruising are most visible. Some firmness at the injection site is normal.
- Days 4 to 7: Swelling begins to resolve. Early results become more readable.
- Weeks 2 to 3: Filler continues to soften and integrate into surrounding tissue. This is when most patients see their true result.
- Week 4 and beyond: Full settling is complete. At this stage, follow-up appointments are most productive.
Wondering about techniques that preserve natural movement as your filler settles? Movement-friendly filler approaches are worth understanding when choosing your provider. And if you’re still in the decision phase, choosing injectables naturally walks through the key considerations.
Pro Tip: Mild bruising is common and not a sign that anything went wrong. It typically resolves within 3 to 5 days. Don’t evaluate your results in the mirror during the first week. Give the tissue time to settle before drawing any conclusions.
Risks, warning signs, and knowing when to seek help
As you recover, being informed about normal vs. abnormal reactions helps you act swiftly if issues arise. Most people have a comfortable, uneventful recovery. But knowing what to watch for keeps you safe and confident throughout the process.
Common side effects vs. red flag symptoms
Normal side effects include mild swelling, light bruising, temporary tenderness, and minor redness at injection points. These are expected and resolve on their own.
Red flag symptoms are different. They signal that something needs immediate attention:
- Severe or worsening pain at or around the injection site
- White, gray, or blue discoloration of the skin, which may indicate vascular occlusion
- A hard, growing lump that doesn’t respond to gentle warmth
- Sudden asymmetry that appears days after the procedure
- Signs of infection: increasing redness, warmth, pus, or fever
Urgent warning: According to the American Academy of Facial Esthetics, vascular occlusion (blockage of a blood vessel by filler) is a serious but rare complication that presents with severe pain and skin color changes including white or blue discoloration. This is a medical emergency. Do not wait to see if it improves on its own.
When to contact your provider or seek immediate care
- Call your provider if you notice unexpected bruising patterns, growing lumps, or asymmetry after day 7
- Seek immediate care if you experience vascular occlusion symptoms, signs of allergic reaction, or fever
- Don’t manage serious symptoms with over-the-counter remedies. Reach out to the clinic that treated you first
Reviewing top fillers for natural results also helps you understand which products carry different profiles of risk and longevity, which is useful context when discussing options with your provider.
Making your results last: Expert strategies for natural enhancement
Having understood recovery and risks, here’s how you can extend your injectables’ benefits and enjoy continued confidence. Longevity isn’t just about product choice. It’s about lifestyle, timing, and a thoughtful maintenance strategy.
Planning touch-ups and maintenance appointments
Most hyaluronic acid fillers last between 6 and 18 months, depending on product, placement, and your body’s metabolism. Rather than waiting until the result has fully faded, scheduling a touch-up before complete resorption often allows your provider to use less product to maintain the same effect. This means smaller volumes over time, which supports a natural, gradual approach to enhancement rather than cycling between “full” and “empty.”
As ASPS notes, complete settling can take several weeks, which is why planning appointments around your social and work calendar reduces the chance of early-appearance anxiety. Building a treatment timeline with your provider means each visit feels intentional, not reactive.
Lifestyle factors that support your results
- Stay well-hydrated. Hyaluronic acid-based fillers are hydrophilic (meaning they attract water), and good hydration supports their volume and softness.
- Wear SPF daily. UV exposure accelerates tissue breakdown and affects how long your results look their best.
- Avoid smoking, which reduces circulation and speeds the degradation of both filler and collagen.
- Manage inflammation through diet and stress reduction where possible.
- Protect your skin with clinical-grade skincare to support the broader tissue environment around your filler.
Pro Tip: Anatomy-aware injectables placed with conservative volume often last longer and look more consistent over time than high-volume treatments. Subtle, precise placement works with your facial structure rather than against it, which means less correction needed at follow-up.
Revisiting injectables for facial rejuvenation gives you a strong foundation for planning a long-term strategy with your provider rather than treating each visit as a standalone event.
Why subtle, medically guided injectables make all the difference
The conventional thinking in aesthetics has long leaned toward visible change as proof of value. More volume, sharper angles, noticeable transformation. But in practice, the outcomes that hold up over time, both aesthetically and emotionally, are the ones that read as you, just supported.
We’ve seen this pattern clearly in our clinical work. Patients who begin with a gradual, conservative approach tend to feel more confident in their results and more comfortable maintaining them. They aren’t self-conscious about whether people can tell. They simply look rested, calm, and well. That’s a different outcome than looking noticeably changed, and for most adults seeking subtle enhancement, it’s the more satisfying one.
The anatomy piece is non-negotiable. Injecting without understanding the vascular geography of the face is where serious complications originate. A skilled, medically trained provider doesn’t just know where to place product. They know where not to. The danger zones around certain arteries and nerves require respect, not guesswork.
The value of subtle enhancements is often underestimated because the results are quieter. But quiet is the point. When your result reads as rested and natural rather than treated and altered, it holds up across every setting, every lighting condition, every expression. That kind of believability is not an accident. It’s the outcome of planning, restraint, and genuine clinical expertise working together.
Ready for natural enhancement? Explore your options in Raleigh
If this guide has helped clarify what a well-supported injectable experience actually looks like, the next step is finding a provider whose approach matches those standards.

At The Aesthetics Lounge and Spa Raleigh, every treatment is built around your anatomy, your goals, and a deliberate pace that never feels rushed. We plan first, educate always, and treat with the kind of precision that keeps you looking like yourself. Explore our full range of aesthetic treatments in Raleigh, learn why clients trust medically led spas for this kind of care, or browse facial enhancement examples to see what subtle, natural results actually look like. We’re on Six Forks Road in North Raleigh, and we’d be glad to start a conversation.
Frequently asked questions
How long does swelling and bruising last after injectables?
Most patients see swelling or bruising resolve within 3 days, but full settling may take up to 3 weeks. Avoid evaluating your final result until at least week two.
What activities should I avoid after fillers?
Avoid NSAIDs, alcohol, strenuous exercise, excessive heat, and massaging the treated area for at least 24 to 48 hours post-treatment. Aspirin and NSAIDs should also be stopped 5 to 7 days before your appointment.
How can I recognize an emergency after injectables?
Watch for severe pain, white or blue skin discoloration, or sudden swelling that worsens rather than resolves. These are signs of vascular occlusion and require immediate medical attention.
Do I need an in-person exam before getting fillers?
Yes. Fillers should be administered after an exam by a licensed clinician who can evaluate your anatomy and health history before any product is introduced.