
TL;DR:
- Preparing properly before injection minimizes bruising and ensures natural-looking results.
- Expert techniques focus on anatomy, slow delivery, and patient communication for safety and refinement.
- Choosing conservative, well-placed products and allowing results to settle are key to natural outcomes.
You want to look like yourself, just more rested. That is one of the most common things people say before their first injectable appointment, and it captures exactly what good treatment should deliver. But achieving that genuinely natural outcome takes more than a skilled hand. It takes thoughtful preparation, the right product in the right place, and a provider who treats your face as a whole rather than a collection of isolated concerns. This article walks you through expert, evidence-based best practices for injectables so you can feel confident about every step of your care.
Table of Contents
- How to set yourself up for safe, effective injectables
- Foundational techniques: Precision, anatomy, and product safety
- Product choices: HA, biostimulatory fillers, and where they work best
- Precision for problem areas: Special considerations for eyes, forehead, and lips
- Injectables in real life: Timeline, recovery, and realistic expectations
- What most providers miss about natural-looking injectables
- Take the next step to confident, natural results
- Frequently asked questions
Key Takeaways
| Point | Details |
|---|---|
| Consult a medical expert | A skilled provider with anatomical knowledge ensures your safety and authentic results. |
| Preparation prevents issues | Simple steps before and after your treatment reduce risks and enhance your experience. |
| Technique impacts outcome | Slow, precise injections and the right tools prevent complications and avoid unnatural looks. |
| Choose the right product | HA and biostimulatory fillers each have best-fit uses—ask your provider for personalized options. |
| Set realistic expectations | Know your recovery timeline and the minor side effects to expect for peace of mind. |
How to set yourself up for safe, effective injectables
A good injectable outcome begins well before you sit in the treatment chair. The decisions you make in the days leading up to your appointment shape how your body responds, how quickly you recover, and how natural your final results look. Skipping this preparation phase is one of the most common reasons people experience more bruising or swelling than necessary.
Here is a clear, practical sequence to follow:
- Stop blood-thinning medications two weeks before your appointment. This includes aspirin, ibuprofen, and naproxen. These medications reduce your blood’s ability to clot, which increases bruising risk significantly.
- Avoid alcohol for at least 48 hours before treatment. Alcohol dilates blood vessels and compounds bruising, making recovery slower and less comfortable.
- Arrive with a clean face and no makeup. This reduces infection risk and allows your provider to assess your skin and facial structure without interference.
- Share your complete medical history. Autoimmune conditions, history of cold sores, and current medications all influence which products are appropriate for you and how your body will respond.
- Plan your post-treatment schedule carefully. As best practices for Botox treatment confirm, you should remain upright for 4 hours after treatment, avoid exercise for 24 hours, apply no pressure to treated areas, and skip waxing or tweezing near injection sites.
Pro Tip: Arnica supplements, taken three to five days before your appointment, may reduce bruising for some patients. Ask your provider whether this is appropriate for you before starting anything new.
“The most successful injectable outcomes start with a conversation, not a syringe. Understanding your health history and your goals is the foundation of results that feel earned, not forced.”
Understanding the role of injectables in a broader aesthetic strategy also shapes how you prepare. Injectables are not a one-time fix. They work best when they fit within a longer plan that accounts for your skin’s current condition, your future needs, and the natural changes your face will continue to make with time. Learning how to prepare for injectables with this mindset makes the entire process feel grounded and intentional.
Foundational techniques: Precision, anatomy, and product safety
Once prepped for your procedure, understanding the expert techniques used during your injectable session helps you know what to look for and expect. Not all injection technique is equal. The difference between a refined, natural result and an overdone one often comes down to how a provider moves through the face.
The most important principle is anatomical awareness. Your face contains a network of arteries, veins, and nerves that vary in location from person to person. Expert injectors understand facial anatomy in three dimensions, not just what is visible on the surface. Slow, methodical injection with constant attention to these structures is what minimizes the risk of serious complications like vascular occlusion, which occurs when filler inadvertently enters a blood vessel.
Key technique principles to understand as a patient:
- Aspiration before injection. Pulling back the syringe plunger for approximately five seconds before depositing product helps confirm the needle is not inside a blood vessel. This is a critical safety step that not all providers consistently practice.
- Slow delivery reduces trauma. Product placed quickly increases pressure in the tissue and raises the risk of displacement, bruising, and uneven results.
- Communication during treatment. You should be able to tell your injector if you feel unusual pressure or discomfort. Experienced providers invite this feedback rather than simply proceeding.
- Facial expression assessment before and during treatment. Watching how you naturally move, speak, and express emotion informs where and how much product is placed.
| Technique element | Why it matters | Risk if skipped |
|---|---|---|
| Aspiration before injection | Confirms needle is outside blood vessels | Vascular occlusion |
| Slow product delivery | Reduces tissue trauma and displacement | Bruising, uneven results |
| Anatomical landmark mapping | Protects nerves and vessels | Nerve injury, vascular complication |
| Patient communication | Allows real-time adjustment | Overcorrection, discomfort |
Pro Tip: Ask your injector whether they use a cannula or needle for your specific treatment area. Blunt-tipped cannulas cause less trauma in many zones and allow for smoother product placement.
Knowing what top natural-looking injectables look and feel like helps you set a realistic benchmark. Browse our full range of injectable treatments to understand the options available before your consultation.
Product choices: HA, biostimulatory fillers, and where they work best
Equipped with safety and technique knowledge, choosing the right injectable product is a critical next step. The product used in your treatment affects not just how it looks but how long it lasts, how it responds to your tissue, and what your recovery looks like.
Hyaluronic acid (HA) fillers are the most widely used category. HA is a sugar molecule that occurs naturally in the body, which makes these fillers well-tolerated and, importantly, reversible with an enzyme called hyaluronidase. Research shows that HA fillers retain 90% volume at two weeks post-treatment and approximately 66% volume across the whole face at twelve weeks, with greater than 70% improvement in periorbital appearance at three months. This kind of objective data helps set realistic expectations rather than relying on before-and-after photos alone.
Biostimulatory fillers work differently. Products like calcium hydroxylapatite (CaHA) and poly-L-lactic acid (PLLA) don’t simply add volume. They stimulate your own collagen production, which means results build gradually and can last longer than traditional HA fillers. They require a different treatment schedule and are better suited to certain areas and patient profiles.
| Feature | HA fillers | Biostimulatory fillers |
|---|---|---|
| Mechanism | Immediate volume | Collagen stimulation |
| Reversibility | Yes, with hyaluronidase | No |
| Longevity | 6 to 18 months | 18 to 24+ months |
| Best for | Lips, tear troughs, fine lines | Cheeks, jawline, skin laxity |
| Onset of results | Immediate | Gradual over weeks to months |
The key to choosing well is matching the product to the specific area, goal, and your skin’s current condition. A provider who understands the difference between filler types will never recommend a one-size approach. If you want a broader sense of how these products are used clinically, our dermal fillers explained resource offers a clear starting point.
Technique evolution also plays a role here. Cannulas are increasingly preferred over sharp needles in high-risk areas because they navigate around vessels rather than piercing through them. This is not a small distinction. It is part of how modern injectable practice has become meaningfully safer while still delivering refined results.
Precision for problem areas: Special considerations for eyes, forehead, and lips
With your product chosen, focusing on specific facial zones ensures you achieve a look that’s harmonious and authentically youthful. The eyes, forehead, and lips each carry specific risks and require distinct approaches. This is where general injectable knowledge becomes area-specific expertise.
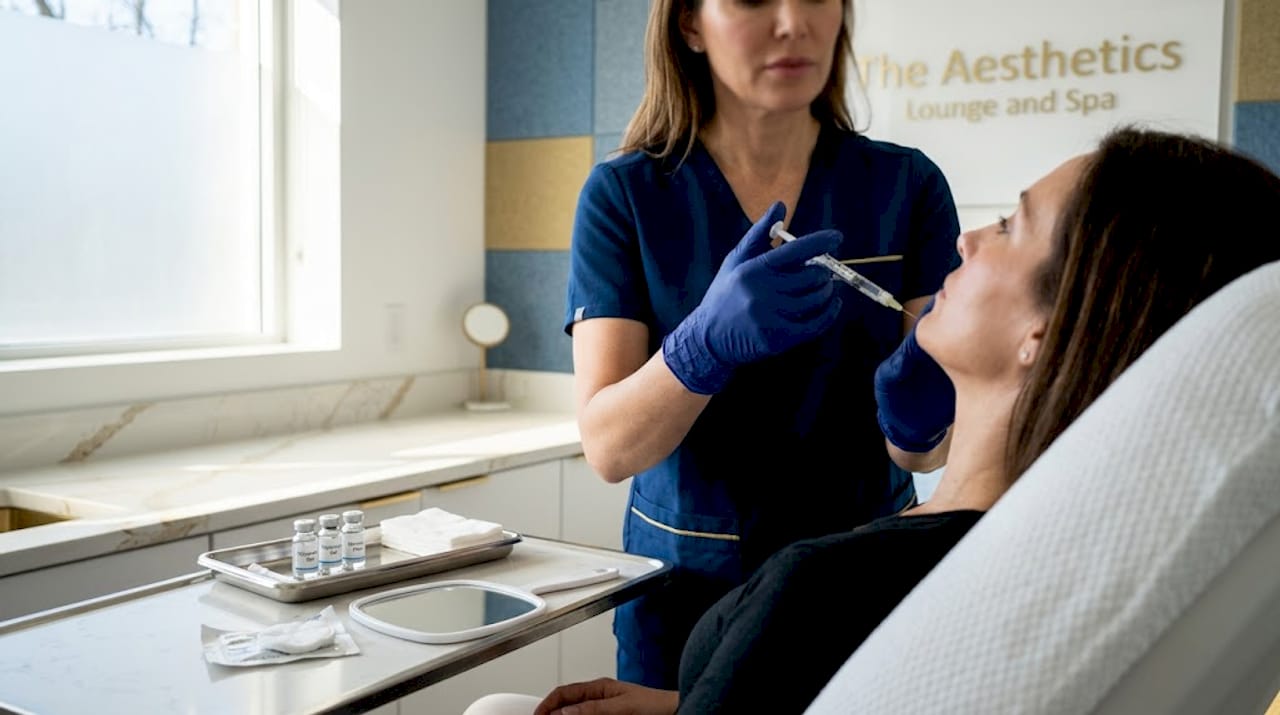
Tear troughs (the hollows beneath your eyes) are among the most technically demanding areas to treat. The tissue here is thin, the skin is delicate, and the anatomy includes structures that demand precise, low-volume placement. A supraperiosteal approach, meaning product placed close to the bone, combined with a cannula, is preferred for safety and natural-looking results. Overfilling this area with hydrophilic (water-attracting) products causes puffiness and a bluish discoloration known as the Tyndall effect. The tear trough requires both low volume and careful product selection to avoid visible edema (swelling).
Here is a structured breakdown of area-specific considerations:
- Tear trough. Low volume, cannula preferred, supraperiosteal placement. Avoid overfilling. Use only appropriate product formulations for this zone.
- Forehead and glabellar lines. This region carries high vascular risk. Product should be placed subdermally (just below the skin surface), and neuromodulators like Botox are often the primary tool here rather than filler.
- Lips. The goal is definition and subtle hydration, not volume alone. Balancing the Cupid’s bow, vermilion border, and philtrum columns requires a precise, conservative approach to maintain natural movement and proportion.
“The most common mistake in lip treatment is adding volume without first addressing definition. A well-defined border reads as full even before volume is introduced.”
Pro Tip: If you are considering tear trough treatment, discuss with your provider whether addressing cheek volume first makes sense. Sometimes lifting the mid-face reduces the appearance of under-eye hollowing without any product near the eye at all.
Understanding how injectables work in facial rejuvenation at an anatomical level changes how you think about area-specific treatment. It shifts the focus from a single concern to the face as a whole. Providers who choose injectables for refined results think this way by default.
Injectables in real life: Timeline, recovery, and realistic expectations
Now that you know technical best practices, it’s vital to understand your personal journey from treatment day to results. Recovery from injectables is generally mild, but it is real. Setting honest expectations protects you from unnecessary worry and helps you plan your schedule.
What to expect in the days and weeks after treatment:
- Day 1 to 3: Mild swelling and bruising are normal and expected. This is not a sign that something went wrong.
- Day 3 to 7: Swelling reduces. You begin to see a more accurate reflection of your results.
- Week 2 to 3: Results settle into their final position. This is the appropriate time to assess whether a touch-up is needed.
- One month mark: Bruising and swelling resolve fully in almost all cases within this window. Vascular occlusion and infection are rare but require immediate attention if they occur.
Results from HA fillers typically last between six and eighteen months, depending on the product, the area treated, and your individual metabolism. Lips tend to metabolize filler faster than cheeks. High-movement areas break down product more quickly than static zones.
Touch-up appointments are normal and expected. They are not a sign that your first treatment failed. In fact, conservative first treatments followed by thoughtful refinement appointments are the hallmark of injectable longevity and benefits done well. Resist the impulse to overtreat at your first session. What looks like too little on day one often looks just right at week two.
The most important rule: if you notice unusual pain, skin color changes, or vision changes after treatment, contact your provider immediately. These are rare but serious signals that need prompt evaluation.
What most providers miss about natural-looking injectables
Here is something most people do not hear enough: the best injectable results often come from what a provider doesn’t do. The field has a long history of equating volume with improvement, and that thinking has produced a generation of overdone outcomes that have made cautious patients hesitant to try treatment at all.
The truth is that less product, placed precisely in the right structural zones, produces far more believable results than generous treatment distributed broadly. Faces lose volume asymmetrically and at different rates across zones. Simply filling everything to equal volume is not restoration. It is renovation, and it shows.
We think the most underused tool in injectable practice is time. Sitting with conservative results for four to six weeks before deciding to add more is not patience for its own sake. It is precision. The face needs time to settle, for the product to integrate with the tissue, and for your own eyes to recalibrate to a change. Rushing a touch-up in week one almost always leads to overcorrection.
There is also the matter of facial change over years. The face you have at 35 is not the face you will have at 45. A personalized approach to aesthetics accounts for this trajectory rather than treating each appointment in isolation. A skilled, medically trained injector maps out not just your current concerns but where your face is likely to change next, building a strategy that protects your natural expression over years, not just months.
The combination of neuromodulators and fillers, when dosed conservatively and placed anatomically, supports the face the way good tailoring supports a suit. You still look like yourself. Just more supported.
Take the next step to confident, natural results
Reading about best practices is a strong start. Choosing the right partner to put them into practice is where outcomes are actually made.

At The Aesthetics Lounge and Spa Raleigh on Six Forks Road, every injectable appointment begins with a conversation, not a treatment plan pushed at you the moment you walk in. We review your goals, your history, and your facial structure before a single syringe is considered. Our full range of aesthetic treatments in Raleigh is built around this same philosophy: measured, anatomy-led, and always intentional. Whether you are approaching injectables for the first time or refining an ongoing plan, our guides on planning for fewer side effects and medically guided skincare steps are here to support every decision along the way.
Frequently asked questions
How long do injectable results typically last?
HA fillers retain approximately 90% volume at two weeks post-treatment and around 66% at twelve weeks across the whole face, though longevity varies by area and individual metabolism.
What should I avoid after injectable treatments?
You should remain upright for 4 hours, avoid exercise for 24 hours, apply no pressure to treated areas, and skip waxing or tweezing near injection sites until fully healed.
Are complications common with injectables?
Serious complications are rare. Mild bruising and swelling are the most common side effects and typically resolve within a month; vascular occlusion and infection occur infrequently when proper technique is followed.
How do I choose the right injector for natural results?
Prioritize a medically trained provider who uses anatomy-based placement and conservative dosing. Providers who combine neuromodulators and fillers thoughtfully tend to produce the most subtle, authentic anti-aging outcomes.